





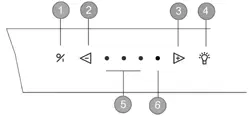
The controls are on the rotating valve.
Air supply When using a hood sufficient air flow is necessary. However large your kitchen may be, there is only so much air available in that space. Opening a door or window or the installation a ventilation grid close to the hood insures a good quality of air flow. Insufficient air flow will impair the extraction efficiency of your hood immensely.
Open the glass cover by turning it towards you. ① switch on / off ② decrease speed levels ③ and ④ LED indication speed level ⑤ increase speed levels ⑥ illumination
Insufficient air flow can cause reflux from other air ducts such as chimneys or combustion appliances. When using a cooker hood and appliances using energy other than electrical in the same space, the pressure in the room may not surpass 4 Pa (= 0.04mBar).
Switch on – switch off To switch the motor on push button ①. The hood will always resume the level it was previously switched off in.
Switch off with 10 minute delay: Press button ① once. The first green LED blinks, the other LED’s remain lit up according to the level in use. After 10 minutes motor and illumination switch off automatically.
Switch off without delay: Push button ① twice.
Levels of intensity To decrease speed levels push button ②. To increase speed levels push button ⑤. Three green LED’s ③ indicate level 1 to 3, one red LED ④ indicates the level ‘POWER’. POWER’ is only used in case of excessive formation of smoke, fumes or odours. Taking into account the large volume of air which is extracted from the room at this level, it’s use should be limited. ‘POWER’ automatically reverts to level 3 after 6 minutes.
Auto-Stop To avoid that the hood will function during a too long period, it will switch off automatically after 3 hours (when no changes to the controls have been made). Motor and lighting will turn off automatically.
Illumination To activate the lights press button ⑥. The lights will switch on at full power. Lighting can be activated independently from the motor.
Use

Recirculation (option) If you have chosen for recirculation, please follow the instructions below.
Cleaning indication: The red LED will light up after 200 working hours (time to regenerate the Monoblock recirculation filter). The recirculation filter is to be found behind the grease filter.
Maintenance of the grease filter The hood contains one metal filter which should be cleaned twice a month.
Grease filter indication After 20 cooking hours, the 4 LEDs will start to blink during 5 minutes, this indicates that the grease filter has to be cleaned. When replacing the cleaned filter, you have to reset the hood by pushing the – button during 5 seconds . If you don’t reset, the LED lights will continu blinking.We advise you to clean your filter twice a month for an optimal operation.
Access to the filter
Reset the Monoblock recirculation filter The cooker hood (motor) must be running! Simultaneously press + and – for 5 sec. until the red indicator lamp flashes 3 times for confirmation.
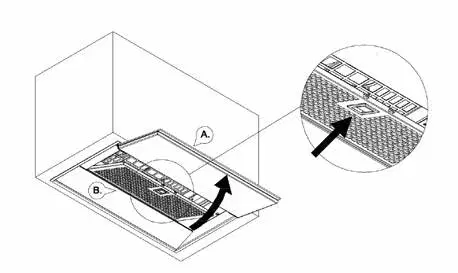
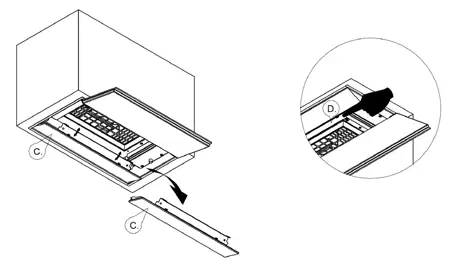
Open the rotating valve (A). Protect the hob. You can take the grease filter (B) from the hood by pulling the handle on the filter. The filter will come down.
Deactivate the programming: Attention! This is not recommended for a cooker hood with recirculation. Simultaneously press + and – for 5 sec. until the third green LED flashes 3 times.
Maintenance of the hood Please allow the lights to cool down sufficiently before cleaning the hood. Use a soft, wet cloth and a mild detergent to clean the hood. Never use aggressive, abrasive detergents or sponges. Bleach will damage stainless steel. The stainless steel surfaces can be treated with Novy Inoxcleaner (906.060) after cleaning.
Maintenance

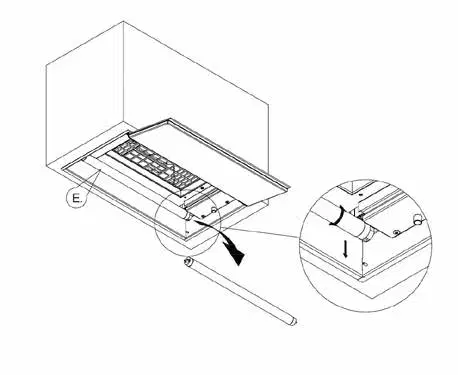
Replacement of the fluorescent lighting
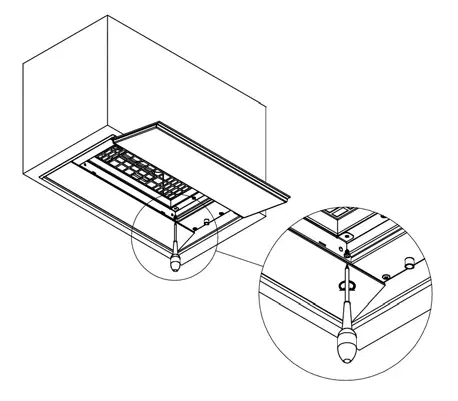
First take the plug from the wall socket or switch off the power group. Let the lamp cool down sufficiently before replacing it.
Reference Novy 680.025
Type of lamp LUMILUX T8 L15 W/840
Reference Novy 686.025
Type of lamp LUMILUX T8 L16 W/840
Electrical output: electrical cord + plug with ground. To be plugged into socket with ground. Check for compatibility with information on type plate (behind filter). Socket must be within reach. Changes or replacement of the electrical cord should be performed by a professional only.
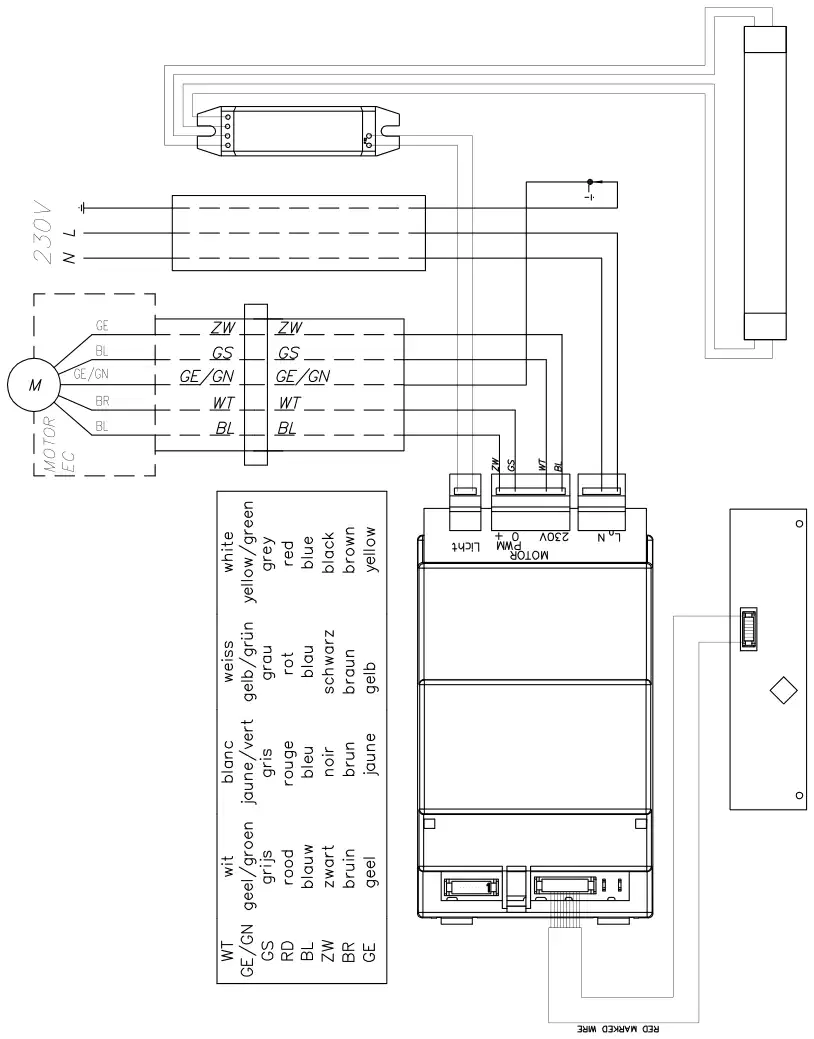
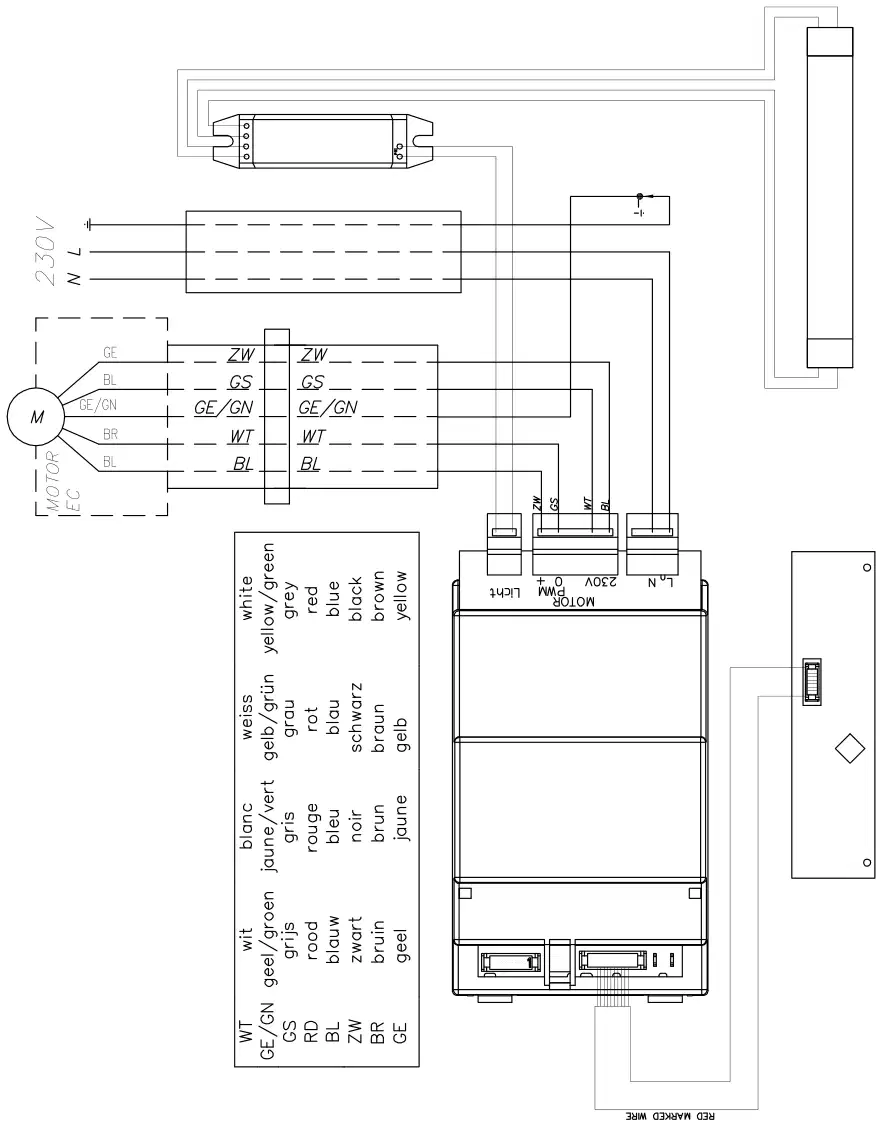
Model Hood 680 · Model Hood 686 · Electrical connection

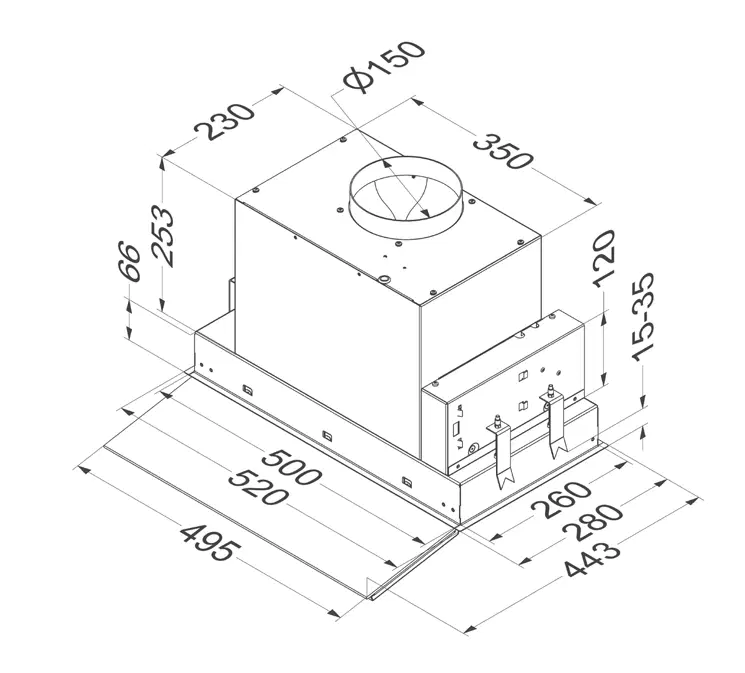
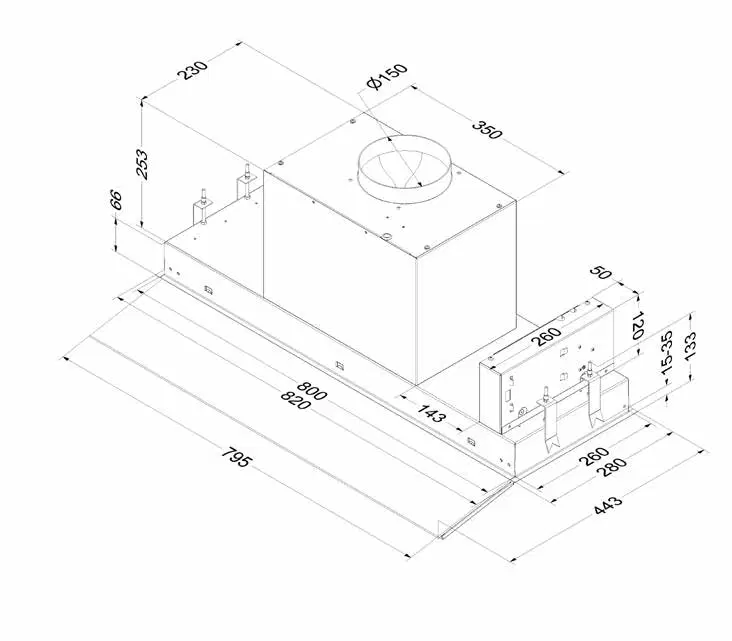
Afmetingen - Dimensions - Abmessungen - Dimensions

Elektrisch schema - Schéma électrique - Elektrischer Schaltplan - Electrical scheme



Besitzer und unser Team antworten in der Regel innerhalb eines Tages – und Ihre Frage hilft auch anderen weiter.
Stellen Sie die erste Frage — andere Nutzer oder unser Team antworten Ihnen.